이전 시간 실습에서는 startActivity() 메소드는 단방향이다. 즉 데이터를 주고 받을 수 없다. 아래 링크에서 확인할 수 있다.
https://devdebin.tistory.com/151?category=1014847
Intent(인텐트)
안드로이드 애플리케이션은 액티비티, 서비스, 브로드캐스트 수신자, 콘텐츠 제공자로 구성된다. 콘텐츠 제공자 : 애플리케이션간의 데이터 공유를 위해 표준화된 인터페이스를 제공하는 컴포
devdebin.tistory.com
그러면 어떻게 인텐트를 통해서 데이터를 주고 받을까?
새로운 액티비티를 띄우고, 액티비티간 데이터를 주고 받기 위해서는 startActivityForResult()를 사용해야 한다고 한다.
데이터는 인텐트에 담아 전달하며, 요청 코드는 각각의 액티비티를 구분하기 위해 사용한다고 한다.
각 액티비티에서 응답은 setResult() 메서드를 사용해서 데이터를 사용한다고 한다.
아래 이미지를 보면 이해가 더 쉽다.

but 여기서 startActivityForResult와 onActivityResult는 Deprecated 되었다. 즉 더 이상 사용하지 않는다.
따라서 ActivityResultLauncher.launch()와 registerForActivityResult() 를 사용해야 한다.
부가데이터(Extra Data)
부가 데이터는 key, value 쌍으로 구성되며, 문자열 , 숫자, boolean, 객체 등 모든 타입의 데이터를 전달 할 수 있다.
데이터를 담을 때는 putExtra() 메서드를 사용하고, 꺼낼때는 타입에 맞게 꺼내야하므로 getStringExtra(), getIntExtra(), getBooleanExtra() 등 다양한 메소드가 있다.

아래 코드로 예시를 확인해보자.
//인텐트에 부가 데이터 담기
var intent = Intent(this, DetailActivity::class.java);
intent.putExtra("name","손흥민");
intent.putExtra("id",20220423);
startActivity(intent);

//인텐트에서 부가 데이터 추출
var data1 = intent.getStringExtra("name");
var data2 = intent.getIntExtra("id",0);
명시적 인텐트와 암시적 인텐트
명시적 인텐트
인텐트에 클래스 객체나 컴포넌트 이름을 지정하여 호출할 대상을 확실히 알 수 있는 경우다.
아래와 같은 코드가 명시적 인텐트다.
Intent intent = Intent(this, DetailActivity::class.java); //Context와 타겟 클래스 이름아래 이미지는 메인 액티비티에서 세컨트 액티비티로 데이터를 넘긴 후에 다시 세컨드 액티비티에서 메인 액티비티로 데이터를 돌려주는 경우의 예시다.

암시적 인텐트
- 암시적 인텐트는 명시적 클래스명이 아닌 Intent Filter 정보를 활용하여 주로 외부 앱 연동 시 사용
- 인텐트 필터는 인텐트 객체 내 정보(Action, Data, Category)를 기반으로 적절한 컴포넌트를 찾아 실행
- 인텐트 필터는 매니페스트 파일(AndroidManifest.xml)의 각 컴포넌트 태그 내에 정의
아래는 예시다.
<activity android:name=".SomeActivity">
	<intent-filter>
    	<action android:name="com.some.ACTION_VIEW"/>
        <category android:name="android.category.DEFAULT"/>
        <data android:scheme="http"/>
    </intent-filter>
 </actvity>
인텐트 필터(intent-filter) 속성
1. Action
- 수행할 액션을 지정한다.
- 인텐트 객체 내의 액션과 인텐트 필터에 정의된 액션과 일치하는지 비교하여 처리한다.

2. Data
수행할 데이터의 URL 지정
3. Category
인텐트 대상(타깃)에 대한 분류 정보를 지정

4. Type
수행할 인텐트 데이터의 명시적 타임(MIME 타입)

- 암시적 인텐트는 약속된 액션(Action)을 지정하여 안드로이드에서 제공하는 기존 응용 프로그램을 실행한다.
- 인텐트 안에 http:// 또는 "tel:"로 시작하는 MIME 타입의 정보를 넣어 시스템에 보내면 시스템이 이 정보를 해석하여 거기에 맞는 화면을 띄워준다.

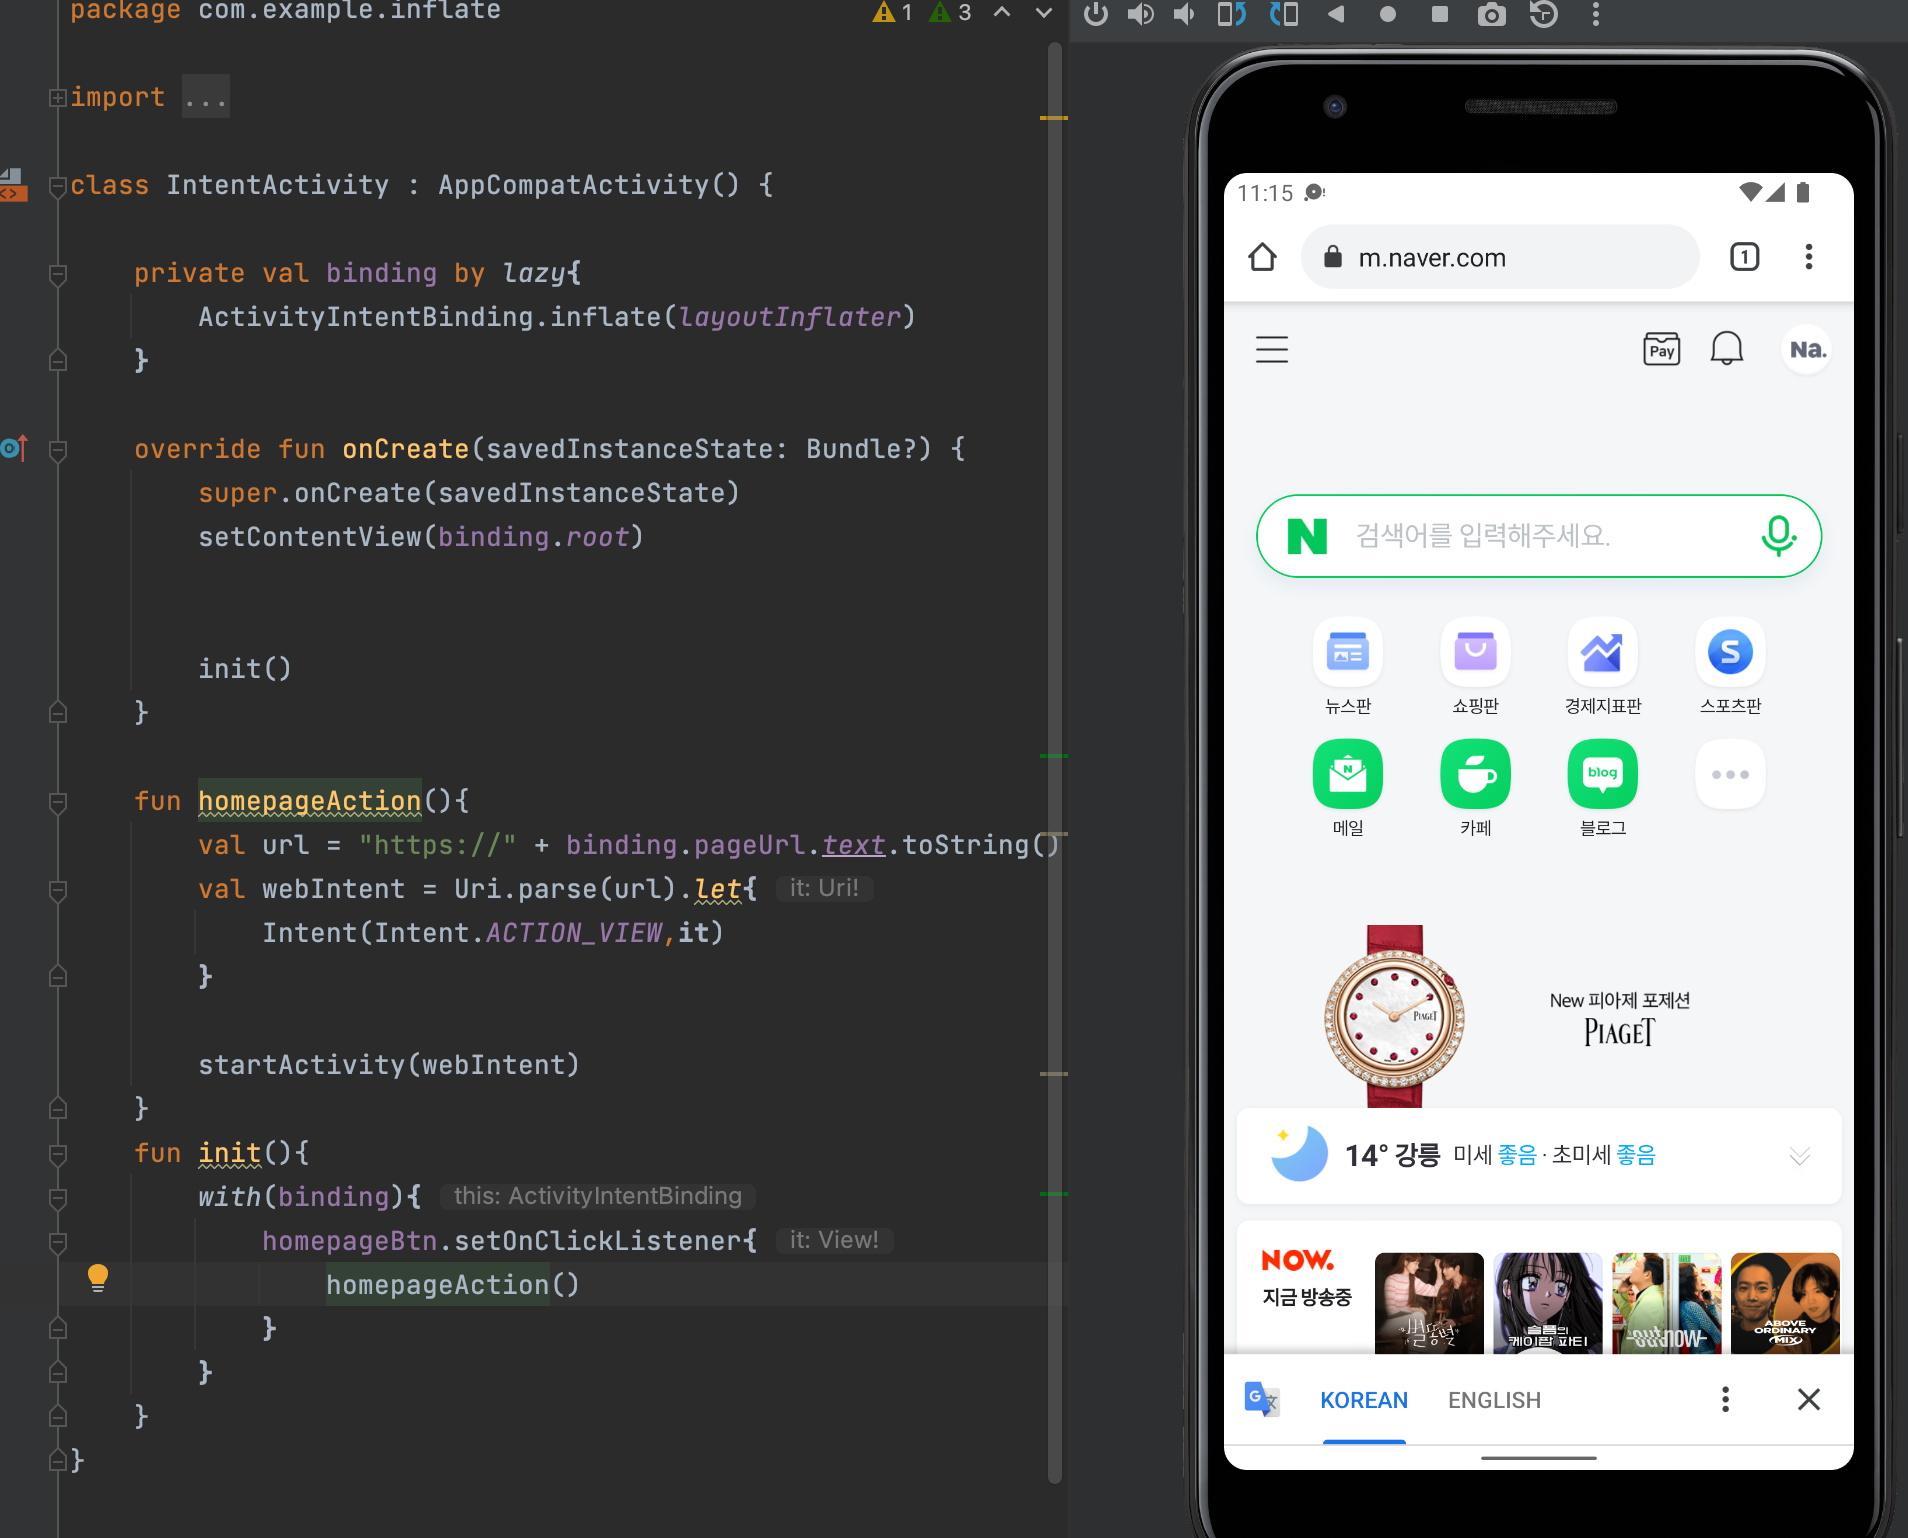
아래는 홈페이지를 연결하는 실습 코드다.
activity_intent.xml 코드다.
<?xml version="1.0" encoding="utf-8"?>
<androidx.constraintlayout.widget.ConstraintLayout xmlns:android="http://schemas.android.com/apk/res/android"
    xmlns:app="http://schemas.android.com/apk/res-auto"
    xmlns:tools="http://schemas.android.com/tools"
    android:layout_width="match_parent"
    android:layout_height="match_parent"
    tools:context=".IntentActivity">

    <TextView
        android:id="@+id/textView"
        android:layout_width="wrap_content"
        android:layout_height="wrap_content"
        android:layout_marginLeft="8dp"
        android:layout_marginTop="47dp"
        android:background="@color/black"
        android:text = "홈페이지 연결하기"
        android:textColor="@color/cardview_light_background"
        android:textSize="25dp"
        app:layout_constraintHorizontal_bias="0.487"
        app:layout_constraintLeft_toLeftOf="parent"
        app:layout_constraintRight_toRightOf="parent"
        app:layout_constraintTop_toTopOf="parent"
        />

    <TextView
        android:id="@+id/textView2"
        android:layout_width="wrap_content"
        android:layout_height="wrap_content"
        android:layout_marginLeft="30dp"
        android:layout_marginTop="52dp"
        android:text="홈페이지 URL"
        android:textSize="17sp"
        app:layout_constraintLeft_toLeftOf="parent"
        app:layout_constraintTop_toBottomOf="@id/textView"
        />

    <EditText
        android:id="@+id/pageUrl"
        android:layout_width="wrap_content"
        android:layout_height="wrap_content"
        android:layout_marginLeft="24dp"
        android:layout_marginRight="16dp"
        android:ems="10"
        android:inputType="textUri"
        app:layout_constraintBaseline_toBaselineOf="@id/textView2"
        app:layout_constraintLeft_toRightOf="@+id/textView2"
        app:layout_constraintRight_toRightOf="parent"
        />
    <Button
        android:id="@+id/homepage_btn"
        android:layout_width="wrap_content"
        android:layout_height="wrap_content"
        android:layout_marginLeft="8dp"
        android:layout_marginRight="8dp"
        android:layout_margin="57dp"
        android:text="홈페이지 연결"
        android:textSize="17sp"
        app:layout_constraintLeft_toLeftOf="parent"
        app:layout_constraintRight_toRightOf="parent"
        app:layout_constraintTop_toBottomOf="@+id/pageUrl"
        />


</androidx.constraintlayout.widget.ConstraintLayout>
다음은 IntentActivity.kt 코드다.
package com.example.inflate

import android.content.Intent
import android.net.Uri
import androidx.appcompat.app.AppCompatActivity
import android.os.Bundle
import com.example.inflate.databinding.ActivityIntentBinding
import com.example.inflate.databinding.ExamSubBinding

class IntentActivity : AppCompatActivity() {

    private val binding by lazy{
        ActivityIntentBinding.inflate(layoutInflater)
    }

    override fun onCreate(savedInstanceState: Bundle?) {
        super.onCreate(savedInstanceState)
        setContentView(binding.root)

        init()
    }

    fun homepageAction(){
        val url = "https://" + binding.pageUrl.text.toString()
        val webIntent = Uri.parse(url).let{
            Intent(Intent.ACTION_VIEW,it)
        }

        startActivity(webIntent)
    }
    fun init(){
        with(binding){
            homepageBtn.setOnClickListener{
                homepageAction()
            }
        }
    }
}
마지막으로 매니페스트 파일에도 아래와 같은 코드를 추가하고 실행하면 잘 작동한다.
<uses-permission android:name="android.permission.INTERNET"/>실습 성공 사진은 아래와 같다. EditText에 naver.com을 입력하면 네이버로 간다!!!

객체 타입 부가 데이터 전달하기
- Parcelable 인터페이스를 이용해 객체를 전달한다.
- Android에서는 자바의 Serialization 개념과 유사한 Parcelable 인터페이스를 제공
- Parcel은 추상화된 객체로 데이터와 객체를 갖고 있는 컨테이너
- 전달하려는 객체를 Parcel에 저장하고 다른 프로세스로 전달
- Parcelable은 Parcel 객체를 read/write 하는 인터페이스
- 따라서 객체를 다른 액티비티에 전달하려면 Parcelable 인터페이스를 구현해야 함

이상으로 포스팅을 마칩니다. 감사합니다.
참고자료
2018,정재곤, “Do it! 안드로이드앱프로그래밍(개정5판)
이지스퍼블리싱(주) 2019,안드로이드withKotlin앱프로그래밍가이드,Icox
2018,강성윤,“깡샘의안드로이드프로그래밍“,루비페이퍼
2014,정재곤,자바+안드로이드기술,길벗


